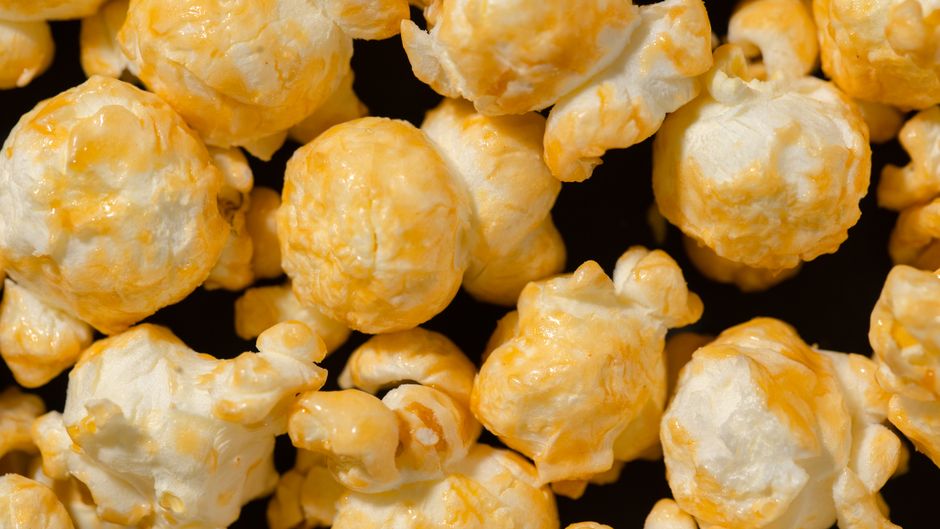
Kettle Corn Recipe: Sweet, Salty & Simple
Kettle corn is one of those snacks that stops people in their tracks. The smell of sugar caramelizing in a hot kettle draws a crowd at fairs, farmers markets, and festivals, and the sweet-and-salty crunch keeps them coming back for more. Whether you’re making it at home on the stovetop or running a concession business with professional equipment, the core recipe is surprisingly simple—and the technique matters just as much as the ingredients.
This guide covers a classic kettle corn recipe, the science behind the perfect pop, common mistakes to avoid, flavor variations, and how to scale your batch when you’re popping for a paying crowd. For a deeper walkthrough, see this guide on how to make kettle corn at home.
The Classic Kettle Corn Recipe
This stovetop method uses a large pot with a lid and produces a batch big enough to share—or to eat alone, no judgment. You’ll need a heavy-bottomed pot (a Dutch oven works well), a lid, and a long-handled spoon or spatula for stirring.

Ingredients
- 1/4 cup vegetable oil or coconut oil (a neutral, high-smoke-point oil)
- 1/2 cup popcorn kernels
- 1/4 cup granulated white sugar
- 3/4 teaspoon fine salt, plus extra to taste
Instructions
- Heat the oil. Add the oil to your pot and set it over medium-high heat. Drop in two or three kernels as testers. When they pop, the oil is ready.
- Add kernels and sugar. Pour in the remaining kernels and sprinkle the sugar evenly over the top. Give it a quick stir so the sugar is distributed, then immediately cover with the lid.
- Shake continuously. Once popping begins, shake the pot constantly and gently over the heat. This keeps the sugar from scorching on the bottom and helps coat every kernel.
- Listen for the slowdown. When popping slows to about one pop every two or three seconds, pull the pot off the heat. Don’t wait for silence—by then, the bottom layer will be burnt.
- Season right away. Pour the popcorn into a large bowl, sprinkle with salt, and toss. The residual heat helps the salt stick. Taste and adjust.
That’s it—four ingredients, ten minutes, and a batch of kettle corn that’s glossy, crunchy, and dangerously snackable. The key detail most home cooks miss is the continuous shaking; it’s what separates golden kettle corn from a smoky, stuck-to-the-pot disaster.
Why Kettle Corn Works: The Science of Sweet and Salty
Regular popcorn and kettle corn are made from the same kernels. The difference is sugar. When sugar hits hot oil alongside popping corn, it begins to melt and caramelize. As each kernel ruptures, the thin layer of molten sugar coats the surface, cooling into a delicate, glassy shell. That shell is why kettle corn crunches differently from plain popcorn—and why it stays crisp for hours if stored properly.

Temperature is the variable that makes or breaks the batch. If your heat is too low, the sugar melts before the kernels pop and pools at the bottom of the pot, burning before the corn is done. If it’s too high, the sugar scorches almost instantly. Medium-high heat, a heavy pot, and constant motion keep everything in the sweet spot.
Salt plays a supporting role that’s easy to underestimate. The tension between salty and sweet is what makes kettle corn taste “complete,” and adding salt immediately after popping—while the sugar coating is still tacky—ensures it adheres rather than falling to the bottom of the bowl.
Common Kettle Corn Mistakes and How to Fix Them
Even a simple recipe has failure points. Here are the ones that come up most often:
- Burnt sugar flavor. Usually caused by a pot that’s too thin, heat that’s too high, or insufficient shaking. Use a heavy-bottomed pot and shake without stopping once the sugar is in.
- Chewy or soggy popcorn. This happens when there’s too much sugar relative to corn, or when the popcorn is stored before it’s fully cooled. Spread it on a sheet pan for a few minutes after popping to let the coating set.
- Sugar clumping at the bottom. Stir the sugar into the kernels before they start popping rather than dumping it on top and leaving it. A quick mix helps it distribute.
- Unpopped kernels glued together. Expect some “old maids,” but if you’re getting large clusters of unpopped corn bound by sugar, reduce the sugar slightly and shake more aggressively in the first minute.
- Stale texture the next day. Kettle corn absorbs humidity quickly. Store it in an airtight container with a desiccant packet if you have one, and keep it away from the stove.
Flavor Variations to Try
Once you’ve nailed the classic, the recipe becomes a base for experimentation. A few popular twists:
- Cinnamon sugar kettle corn: Swap half the white sugar for brown sugar and add a teaspoon of cinnamon to the salt.
- Spicy-sweet: Add a pinch of cayenne or chili powder to the salt for a slow-building heat.
- Maple bacon: Toss the finished popcorn with a little maple sugar and crumbled cooked bacon—a farmers market favorite.
- Vanilla caramel: Add a quarter teaspoon of vanilla extract to the oil before the kernels go in (stand back—it can sputter).
- Vegan swap: The base recipe is already vegan if you use plant-based oil, since white sugar is typically vegan-friendly in most regions. Check your sugar if strict sourcing matters to you.
If you’re making kettle corn professionally, keep at least one rotating seasonal flavor. Lemon, cotton candy, and dill pickle have all proven popular in recent years, and a rotating flavor gives repeat customers a reason to come back.
Scaling Up: Making Kettle Corn in Volume
Doubling a home recipe in a home pot doesn’t work well—the corn needs room to tumble. If you’re popping for a crowd, you need a kettle built for volume, not a bigger batch in a stockpot. This specialty popcorn equipment guide breaks down the options.
This is where purpose-built equipment changes the equation. Commercial kettle corn machines use a heated kettle with an integrated stirring mechanism, so every kernel gets consistent contact with oil, sugar, and heat. The result is more even caramelization, fewer burnt batches, and a near-elimination of the “shake the pot” problem—and a solid commercial grade popcorn cooker buying guide will help you compare models. Modern aluminum kettle machines are also designed to be seen—glossy, clean lines that give customers a show—which matters when your business is built on the aroma and spectacle of fresh-popped corn.
Volume production also means thinking about workflow:
- Batch size over batch speed. A slightly smaller batch that pops reliably and looks great beats a huge batch that risks scorching. Consistency builds your reputation.
- Seasoning station. Pre-measure sugar and salt into single-batch containers so you’re not measuring mid-rush.
- Hold time. Fresh kettle corn is best within the first few hours. Pop in smaller, more frequent batches rather than one giant morning batch that goes soft by afternoon.
- Pairing with drinks. Sweet, salty kettle corn drives thirst. Many successful concession operators pair their popcorn with fresh-squeezed lemonade, which rounds out the ticket and keeps lines moving.
Equipment choice is ultimately about repeatability. A recipe you can reproduce fifty times a day with the same result is worth more than a perfect one-off batch, and that’s the real argument for a machine designed for the job. When you’re ready to take it to events, an event food vendor startup guide covers the business side.
Storing and Serving Kettle Corn
Kettle corn is at its best within a few hours of popping, while the coating is crisp and the aroma is still on it. For short-term storage, an airtight container at room temperature will hold it for a day or two. Avoid refrigeration—moisture from the fridge turns the sugar coating sticky and stale-tasting.
For serving, presentation does a lot of work. Clear bags let the golden color show, and a warm display creates the aroma that pulls people in from across the lot. If you’re selling at events, keep a fresh batch popping on a schedule so there’s almost always something warm ready to hand over.
Conclusion
Kettle corn comes down to four ingredients, steady heat, and constant motion. Master the stovetop recipe first—it teaches you how sugar behaves under heat, and that instinct will serve you whether you’re making a bowl on a Sunday afternoon or running a full concession stand. When you’re ready to scale, the right equipment handles the shaking, the stirring, and the heat consistency for you, letting you focus on flavor and on your customers.
Start with a small batch, taste as you go, and don’t be afraid to burn one or two along the way. Every great kettle corn operation started with someone standing over a hot pot, shaking it like they meant it.
